
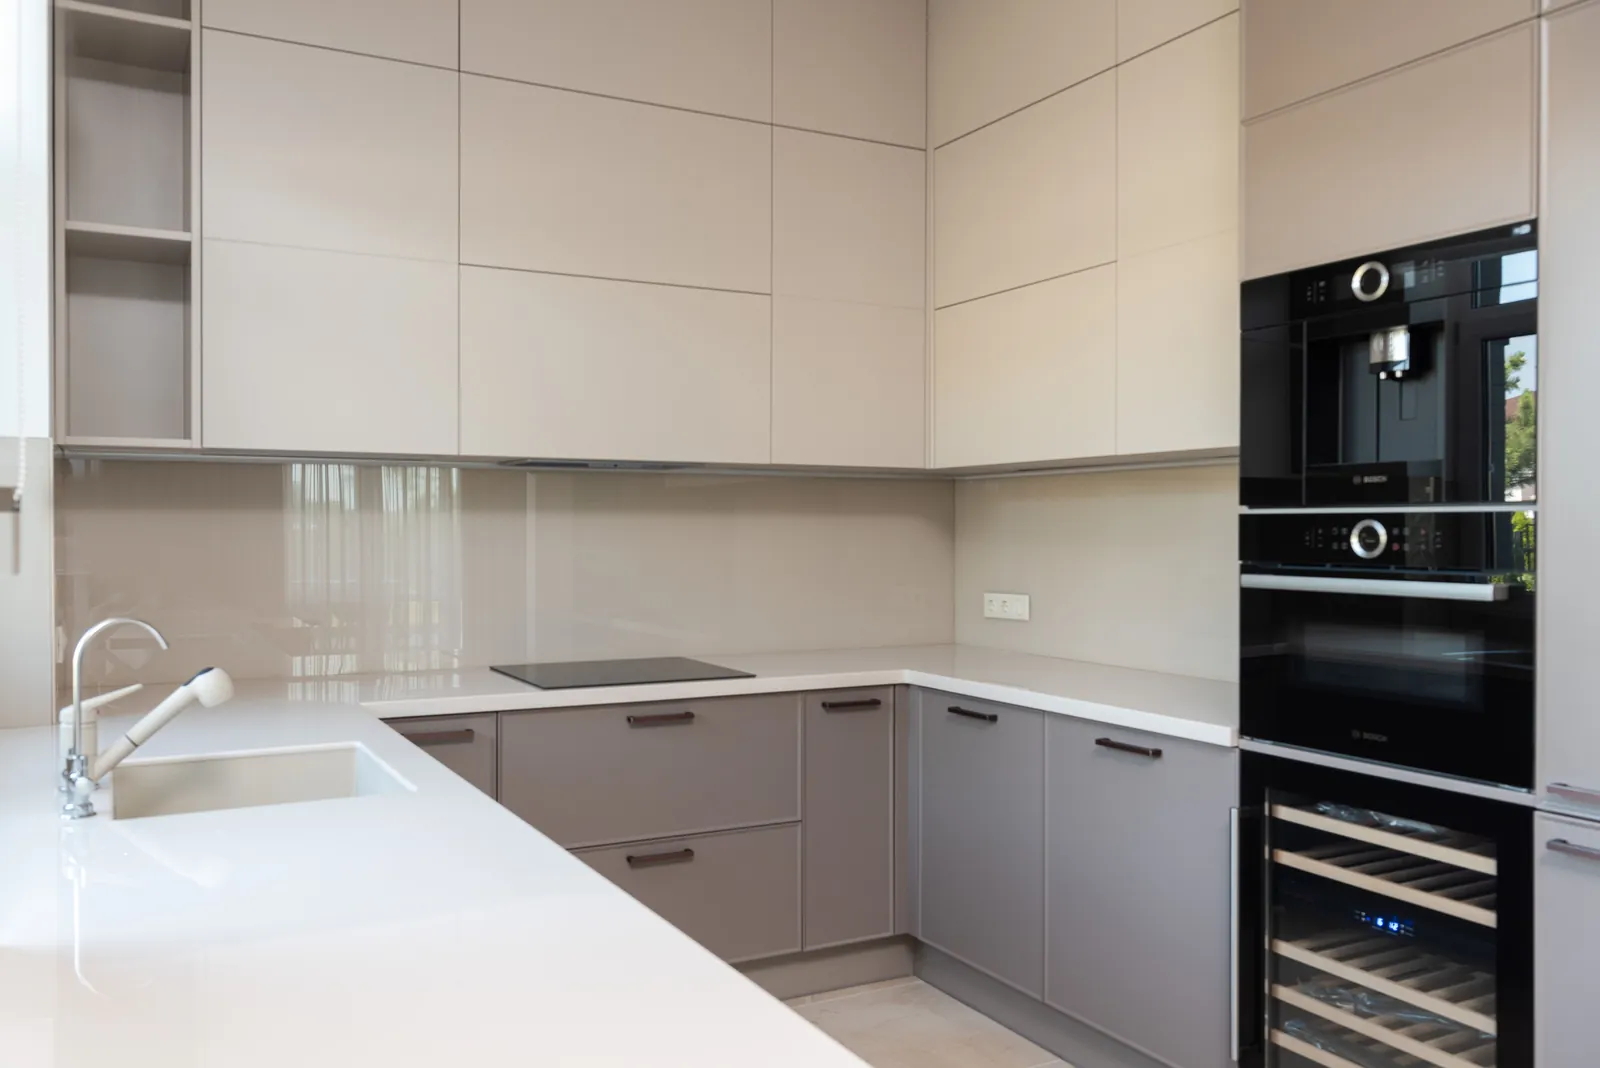
A glass kitchen back wall is sleek, hygienic and easy to clean. You don't see any joints like with tiles and you can easily wipe away grease or cooking splashes. This makes glass a popular choice behind the stove, hob or countertop.
The short rule: for a kitchen back wall, always use glass that is suitable for heat and use, usually tempered glass. Measure sockets, recesses and edges very accurately, because after hardening you can no longer adjust glass. In this article we explain which glass to choose, which thickness is useful and what you should pay attention to when measuring, mounting and maintenance.
What is a glass kitchen back wall?
A glass kitchen backsplash is a glass plate that is placed against the wall behind the countertop, hob or sink. The glass protects the wall against grease, water, dirt and heat. You can place a glass back wall behind:
- induction hob
- ceramic hob
- gas hob
- sink
- complete kitchen worktop
- coffee corner
- utility worktop
- bar or pantry
The back wall can be clear, matt, colored or lacquered. Glass can also be placed over an existing wall finish, for example over plasterwork or tiles.
Why choose glass behind the countertop?
Glass is smooth, sleek and easy to clean. The most important advantages of a glass kitchen back wall:
- hygienic and without joints
- easy to clean
- modern look
- good resistance to moisture
- customization possible
- suitable behind the hob
- available in different colours
- makes a small kitchen seem more spacious
- can be placed over existing tiles
The lack of joints in particular is a major advantage. Tile joints quickly become dirty or discolored. A glass plate does not have that problem.
Which glass do you use for a kitchen back wall?
Toughened glass is usually used for a kitchen back wall. Tempered glass is stronger than normal glass and more resistant to temperature differences. This is important, because a kitchen back wall has to deal with:
- heat from the hob
- steam
- fat splashes
- water
- cleaning products
- bumps from pans or kitchen utensils
Normal glass is less suitable behind a hob. It can break due to heat or temperature differences.
Rule of thumb: choose tempered glass and measure sockets, recesses and edges in advance to the nearest millimeter. You can no longer cut, drill or grind tempered glass after hardening.
Why tempered glass?
Tempered glass is heated and quickly cooled during production. This makes the glass stronger than standard glass. Advantages of tempered glass in the kitchen:
- better resistance to heat
- stronger on impact
- safer breaking behavior
- suitable for daily use
- easy to clean
- sleek appearance
When tempered glass breaks, it shatters into small grains. That is safer than large sharp shards. Please note: tempered glass cannot be cut, drilled or ground after production. Everything must therefore be carefully measured in advance. You can read more about this in Tempered glass: what is it?.
Can you use normal glass?
Normal glass is usually not a good choice behind a hob. The risk of breakage is greater, especially with gas or other heat sources. Normal glass can be used in places without heat load, for example as a decorative wall plate away from the hob. But even then, tempered glass is often more sensible, because a kitchen is used intensively.
Preferably choose tempered glass when:
- the glass is behind the hob
- there are sockets
- the glass is large
- the glass is cleaned often
- there is a risk of impact
- you want a sustainable solution
What thickness of glass for a kitchen back wall?
Glass of 6 mm is often used for kitchen back walls. That is sturdy enough for many applications and remains relatively slim.
| Thickness | Application |
|---|---|
| 4 mm | Only for light, small applications without heat |
| 6 mm | Most often chosen for kitchen back walls |
| 8 mm | Larger plates or extra sturdy appearance |
| 10 mm | Less common, heavy and fat |
For most kitchens, 6 mm tempered glass is a good choice. For large rear walls or vulnerable situations, 8 mm may be better. Are you in doubt? Then read Which glass thickness do I need?. Heavier plates also require sturdier mounting — calculate the glass weight in advance.
Glass behind a gas hob
You have to be extra careful with a gas hob. Gas flames emit direct heat and pans can be placed close to the wall. This can cause the glass to become warm. Always use tempered glass behind a gas hob and keep sufficient distance between flame, pan and glass. NB:
- distance between hob and wall
- distance between burner and glass
- pan size
- ventilation
- type of glass
- mounting method
- kit suitable for heat
If in doubt, it is wise to check the specifications of the hob.
Glass behind induction
With induction, the heat load is usually lower than with gas, because the plate itself emits less open heat. However, tempered glass is also usually used behind induction, because:
- pans can be hot
- grease splashes occur
- steam and moisture hit the wall
- the kitchen is used intensively
- the glass can be bumped
A glass rear wall behind induction is therefore very suitable, as long as the glass is measured and installed properly.
Glass behind the sink
Behind the sink, glass mainly has to deal with water, soap and dirt. Heat is less important there, but moisture resistance is. A glass back wall behind the sink prevents:
- damp spots
- dirt on the wall
- mold in joints
- damage to plasterwork
- discoloration due to water
Glass is also nice here because you can easily wipe it with a cloth.
Clear or colored kitchen back wall?
You can choose from different types of appearance.
| Type of glass | Appearance |
|---|---|
| Clear glass | Leave the wall behind visible |
| Extra clear glass | Less greenish glow |
| Matte glass | Calm, soft appearance |
| Colored glass | Sleek color back wall |
| Lacquered glass | Even color layer on the back |
| Glass with print | Decorative or personal |
With clear glass you can see the wall behind the glass. Then the surface must be neat. With colored or lacquered glass, the back is finished, giving you an even color. View the options in colored glass.
Extra clear glass: when to choose?
Standard glass naturally has a light green tint. This is sometimes noticeable with clear glass, especially with white or light backgrounds. Extra clear glass has less green discoloration. This means that light colors remain more beautiful and pure. Extra clear glass is especially recommended for:
- white kitchen back wall
- light colors
- clear glass over a white wall
- luxurious finish
- modern kitchens
- colourfast result
With dark colors the difference is less noticeable.
Glass with color or lacquer layer
A colored glass kitchen back wall is often made with a layer of lacquer on the back. This means that the front remains smooth glass, while the color is behind the glass. If you choose a uniform color in RAL, look at tempered lacquered glass or enamelled glass. Advantages:
- sleek appearance
- color is protected behind glass
- easy to clean
- no joints
- many color options
- modern finish
Please note: the color may appear slightly different due to the glass thickness than on a sample or screen. Extra clear glass is often more attractive with light colours.
Cutouts, sockets and holes
Many kitchen back walls have recesses for sockets, switches or pipes. These must be measured exactly in advance. Important:
- position from the left
- position from the bottom
- width and height of the recess
- round or rectangular recess
- distance to the glass edge
- type of cover frame
- space for mounting
- multiple sockets in one line
Because tempered glass cannot be cut or drilled afterwards, cutouts must be correct immediately. An error of just a few millimeters can mean that the glass does not fit.
Can you drill holes in a glass kitchen backsplash?
Yes, but only before tempering the glass. Holes, recesses and rounded corners are selected when assembling in the custom glass configurator and must therefore be made in advance. After hardening, you can no longer process tempered glass. If you try to drill or grind it, the entire plate can break.
Determine in advance:
- where the sockets will be located
- where pipes are located
- whether holes are needed
- whether recesses are needed
- whether corners should be rounded
- whether the plate must consist of several parts
One piece or multiple parts?
A glass back wall can consist of one large plate, but sometimes multiple parts are more practical. One piece of glass gives the tightest result, but is not always convenient. Multiple parts are wise for:
- very long back walls
- difficult installation
- many sockets
- transport problems
- corner kitchens
- large glass plates
- limited access to the house
- risk of measurement errors
A partial seam is often less disruptive than a panel that is too large, too heavy or difficult to assemble.
How do you measure a glass kitchen back wall?
Proper measuring is perhaps the most important part. Custom glass must fit exactly, but also needs small clearance. Always measure in millimeters. Measure:
- total width
- total height
- distance to the worktop
- distance to the upper cabinets
- position of sockets
- position of switches
- recesses
- corners
- possible tilt
- space left and right
- distance to the hob
- any seams between plates
Measure in multiple places. Kitchen countertops and walls are not always completely straight. A step-by-step explanation can be found in measuring glass.
Allow for slack
A glass plate should not be stuck between the worktop, wall and cabinets. A little slack is always needed. Why clearance is important:
- walls can be crooked
- glass expands slightly with temperature
- installation must remain possible
- sealant seams need space
- glass must not be under tension
A glass plate that is measured too tightly can be difficult to install or even break.
What if the wall is not straight?
Kitchen walls are often not perfectly straight. You especially notice this with long glass plates. Possible solutions:
- small sealant seam all around
- glass in several parts
- make a mold
- order the back wall slightly smaller
- compensate for inequality with mounting kit
- first level the wall
In case of large deviations, it is wise to first flatten the wall. Glass is straight and does not follow a curved wall.
Can you install glass over tiles?
Yes, a glass kitchen backsplash can often be placed over existing tiles. This is useful during renovation. Advantages:
- tiles do not need to be removed
- quick makeover
- less demolition work
- sleek new look
- old joints disappear behind glass
Please note:
- tiles must be stuck
- surface must be clean and free of grease
- protruding tiles can cause problems
- sockets may need to be brought forward
- edges must be neatly sealed
In case of large irregularities, it is better to level it first.
How do you install a glass kitchen back wall?
A glass kitchen back wall is usually glued with a suitable mounting kit or installed with mounting material. Commonly used mounting:
- special mirror glue or glass sealant
- neutral mounting kit
- spacers
- screw mounting with holes
- profiles
With lacquered glass you must use sealant that is suitable for the lacquer layer. The wrong sealant can show through, stain or damage the coating.
Which kit do you use?
Use sealant that is suitable for glass, the kitchen environment and, if necessary, the paint layer on the back. The kit must:
- good adhesion
- be suitable for glass
- be moisture resistant
- can withstand kitchen use
- does not damage coating
- not transparent
- remain sufficiently elastic
Don't just use random kit. The choice of sealant is extra important for colored or lacquered glass. See which kit do you use for what? for the correct choice.
Sealing edges
After installation, the edges are usually sealed. The underside of the worktop is especially important, because water and dirt can get there. Seams ensure:
- a watertight connection
- a neat finish
- less dirt behind the glass
- protection of the surface
- a tight transition
Use a sealant color that matches the worktop, glass or kitchen design.
Maintenance of a glass kitchen back wall
A glass back wall is easy to clean. Usually a soft cloth with warm water and mild detergent is sufficient. Tips:
- do not use a scouring pad
- avoid aggressive substances
- remove fat regularly
- dry with a microfiber cloth
- use glass cleaner for streaks
- check the sealant seams
- clean socket edges carefully
Because there are no joints, glass often remains neat longer than tiles.
Can glass be scratched?
Yes, glass can scratch. Although glass is hard, sand, metal objects or abrasive cleaners can scratch it. Prevent scratches by:
- do not use a scouring pad
- do not use abrasives
- do not bump pans against the glass
- first rinse away dirt and sand
- use soft cloths
Small scratches are often difficult to repair. So prevention is better.
Safety with glass kitchen rear walls
Because a kitchen is used intensively, safety is important. Therefore, tempered glass is usually chosen. Safety points:
- use tempered glass behind the hob
- have cutouts made in advance
- avoid tension during installation
- use suitable sealant
- keep your distance from heat sources
- avoid hard impacts on the edges
- ensure neat edge finishing
The edges of glass are more sensitive than the surface. So make sure that the glass does not clamp hard against stone, metal or screws. You can read more about safe applications in safety glass, and about neat edges in edge finishing: sharp edges or ground?.
Common mistakes
- Do not choose tempered glass behind the hob — normal glass is more sensitive to temperature differences and breakage.
- Measuring sockets incorrectly — with tempered glass you cannot adjust anything afterwards.
- Measure too tight — glass needs clearance; a plate that is too tight may break or not fit.
- Using the wrong sealant — some sealants will damage paint or coating or show through.
- Do not check wall — a crooked or bumpy wall will make installation difficult.
- Choose standard glass for light colours — extra clear glass is often nicer with white or light colours.
- Choose one large plate when assembly is difficult — sometimes multiple parts are more practical and safer.
Selection aid: which kitchen back wall should you choose?
| Situation | Best choice |
|---|---|
| Behind the hob | Tempered glass |
| White back wall | Extra clear glass |
| Color behind glass | Lacquered glass |
| Small kitchen | Clear or light glass |
| About existing tiles | Custom glass plate |
| Lots of electrical outlets | Accurately measured recesses |
| Long wall | One plate or multiple parts |
| Sleek modern kitchen | Lacquered or extra clear glass |
| Budget-friendly | Clear tempered glass |
| Luxurious appearance | Extra clear lacquered glass |
Checklist before you order
- Is the glass behind a hob?
- Is tempered glass necessary?
- What thickness do you want to use?
- Do you want clear, matt, colored or lacquered glass?
- Does extra clear glass look better with your color?
- Are all dimensions included in millimeters?
- Have sockets been measured exactly?
- Are cutouts necessary?
- Is the wall straight and flat?
- Do you want one record or multiple parts?
- Is there sufficient clearance all around?
- Which kit is used?
- Do the edges need to be sealed?
- Does the panel fit through doors, hallways and stairs?
- Can the plate be mounted safely?
Conclusion
A glass kitchen back wall is sleek, hygienic and practical. The biggest advantage is that you have no joints and the wall is easy to clean. Glass is therefore an attractive and maintenance-friendly solution, especially behind a hob or sink.
Usually choose tempered glass, especially behind a hob. For light colors, extra clear glass is often nicer, because standard glass can have a light green tint. Measure sockets, recesses and edges very accurately, because tempered glass cannot be adjusted afterwards. Also consider mounting, sealant, clearance and the flatness of the wall.
Ready to order? Create your kitchen back wall with custom glass. Learn more about tempered glass, the correct glass thickness and measuring glass.